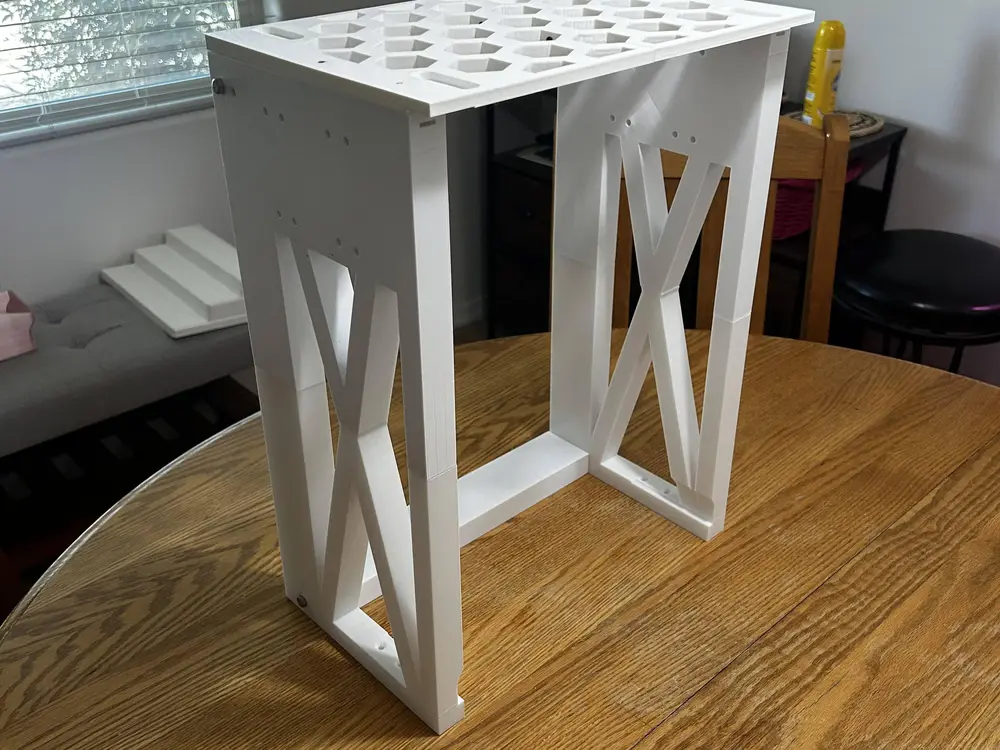
LAD Design ACE 2 Pro support structure for Kobra X


LAD Designs Mount and Stabilizer for the Kobra X, ACE 2 Pro and the AC[E] X Pro Dry box
What's new in Rev 3
- Re-added holes in the left side for the gantry holes.
What new in Rev 2.
- M6 Threads added to top and bottom cross bars. M6x40 Bolts can be used instead of threaded rod.
- M2.5 Threads added to mounting ACE 2 Pro Hub and Retraction sensor.
- Clearance added for gantry collar.
- Minor adjustments to dimensions for squaring up build.
This mounting and stabilizing rack was designed for two purposes.
1. Save space on the desktop and incorporate the ACE 2 Pro with a more compact design.
2. Reduce the weight on the Kobra X gantry to avoid excessive sway that may affect the Z offset and possibly knocking print jobs off of the bed.
It can also be used without an ACE 2 Pro to move objects off of the gantry. The back top bar is shaped similar to the one on the Kobra X and should be able to mount other types of dry boxes or accessories made for it.
This design does not support wrap around waste baskets.
My original design was around the AC(E)-X Pro dry boxes on Patreon because they offer side-mount options and both single and dual-box designs.
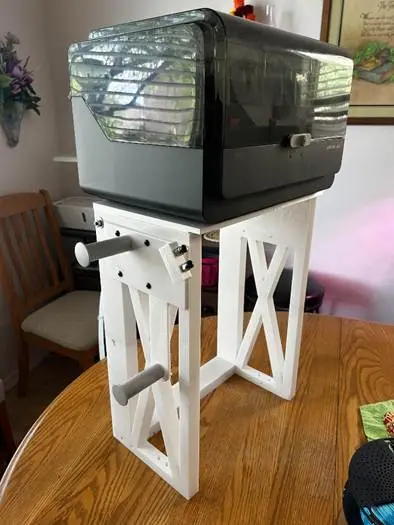
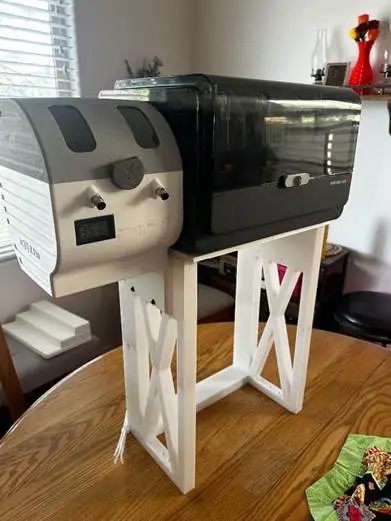
Dowels are used throughout for aligning and assembling each section.
The locks at the top of the gantry is more just to stabilize the gantry and not meant to put any force in any direction on the gantry. If the platform you’re using pulls on the gantry at the top, I would suggest not using the locks at the top and only the lower clips. Any excessive forces pulling the top of the gantry back may affect your Z-offset and bed leveling. If you wish to have more stability in the rack you may use the screw holes on the bottom sides to attach it to the platform.
I suggest using PETG at 240° and bed at 75°. I also suggest using Gyroid infill at 9% and 5 walls to reinforce screw holes. I was not successful in using the modify tool in the slicer to increase infill around the screw holes.
The system was designed with alignment dowels to make assembly and gluing easy.
You will need:
- 4-M5x 25 Screws and nuts
- 4-M6 40 Screws and nuts
- Approximately 1400 grams of filament
- A tube of WELD-ON 16383 16 Acrylic Plastic Cement or similar acrylic adhesive.
- Wood clamps greater than 18.13” jaw width or other means of clamping parts together while glue is drying.
- 6 Self Tapping M3x20
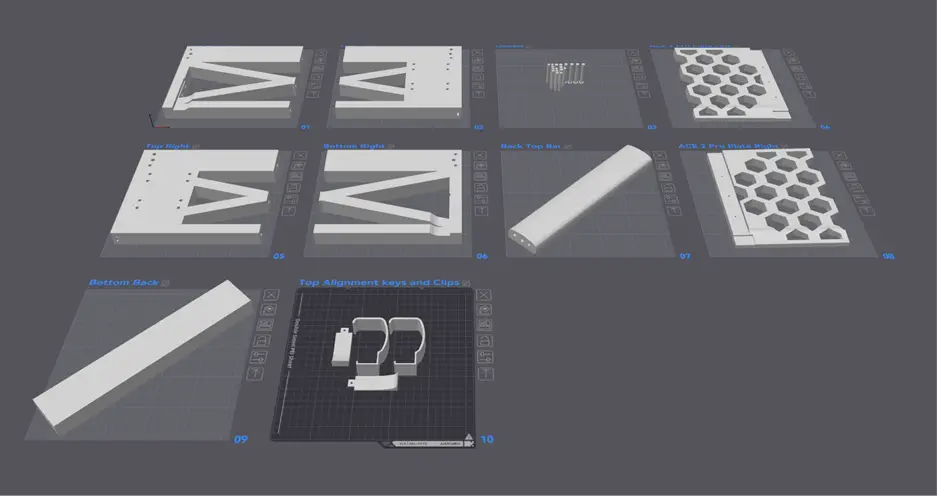
Assembly:
1. Print parts including dowels Printed with PETG Nozzle at 240 and Bed at 75 .20mm layer height and 5 walls to add strength to holes.
2. Use dowels to align the two halves of the side structures, add glue and clamp together for at least 2 hours.
3. Put dowels into the top and bottom cross members. (Holes that can be used with ¼” threaded rod use the larger dowels) If using with the AC[E]-Dry box use the back holes for the threaded rod and plug the other holes with the dowels.
4. Align the bars with the holes on the side structures, clue and clamp together. If you are using ¼ rods, they not only add strength and stability but can be use to clamp parts together.
5. Assemble the top plate with the 4-5mx25 Screws and nuts. Gluing is optional but it can add strength.
6. Set the plate on top with the tapered edge forward. For the ACE 2 Pro align the back even with the back of the structure. It will extend partially over the Kobra X gantry. Add self-tapping screws to secure it to the structure. (If using with Sovol dehydrator move the plate back to allow the original mounts to attach to the gantry and secure with self-tapping screws.)
7. Attach the structure to the Kobra X at the bottom with the clips.
8. Use the upper alignment keys and insert through the top of the gantry and align with holes in structure. (If you are confident you have a level surface and the structure will not put any forces on the gantry, use self-tapping screws to secure the structure to the gantry.
9. Optionally, you can add screws to the bottom of the structure securing it to you printing platform.
NOTE: Attaching the ACE 2 Pro use M2.5 x 25 self-tapping screws. (I was not able to find self tapping screws that size). I just used a slightly larger wood screw and screw it in a couple turns and back out. It gave enough grip for the original bolts to screw in.) Rev 2 added threads to the holes that should match up to the original screws. However, in testing, different filament had different shrink factors and would vary from brand to brand and color to color of filament. You may need to use the wood screws anyways.
Links:
AC(E)-X Pro : https://www.patreon.com/posts/ac-e-x-pro-156876582
LAD Design Rack Dry Box Side Mount
Beta Side Spool mounts.
Beta 2, whats new:
- re-arranged spool holders and angle of filament feeds
- included single holder version for using with ACE 2 Pro
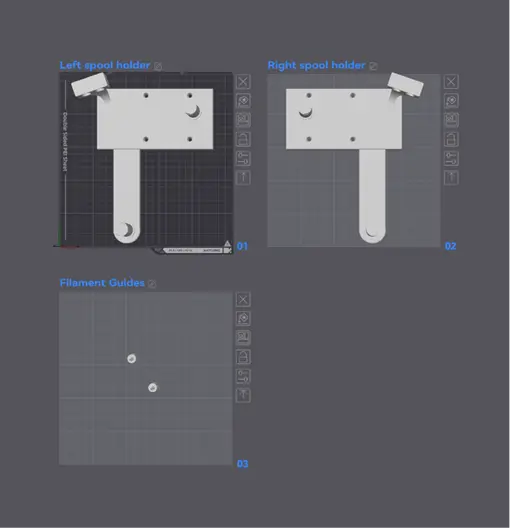
Side spool mounts are beta models and mount to the sides of the structure. It uses PC4-M10 Bowden Tube Coupler and 4 – M5x25 bolts, nuts and washers. Printed with PETG at 240 nozzle and 75 bed temps. The filament guides are for easier and smoother filament loading. Once aligned with Coupler lightly glued in place.
You are prohibited from sharing, sub-licensing, selling, renting, hosting, transferring, or distributing the digital file or 3D printed versions of this object, as well as any other derivative work in either digital or physical form (including remixes).You are not allowed to use the objects in any manner that involves charging money or collecting fees without permission.