Purge Calibration Test Kobra X


1 — Open the test file
Pick your printer/slicer file from your files, then:
- Open Anycubic Slicer Next
- Click Open Project
- Open the 3MF file into a new project
You will then see the loaded project with several plates (depending on the number of colors).
2 — Set colors and flushing values
If you opened the correct file for the Kobra X1, there are only a few settings you need to change.
Steps:
- Select the colors and filament you want to use
- Go to:
Filament Settings → Flushing / Purge Settings
There you will see the purge values between colors.
Important setting:
You want this to be:
- Flushing volume:
50 - Multiplier:
1.00
If it looks different (which usually happens after changing colors), you need to change all flushing values back to 50.
3 — Check infill directions
Before slicing, verify this setting.
Go to:
Print Settings → Infill
Find:
- Sparse infill direction
- Solid infill direction
Both must be 0
If they are not, change them to 0 degrees.
Print Settings → Quality
- Print infill first enabled
This ensures consistent test results.
4 — Slice and print
Now you are ready to print the test.
Steps:
- Choose which plate you want to print:
- 2 Colors
- 3 Colors
- 4 Colors
- Click that plate to select it
- Click:
SLICE
- Load your filament if you have not already
- Click:
Or send the file to the printer and start the print.
5 — Expected result
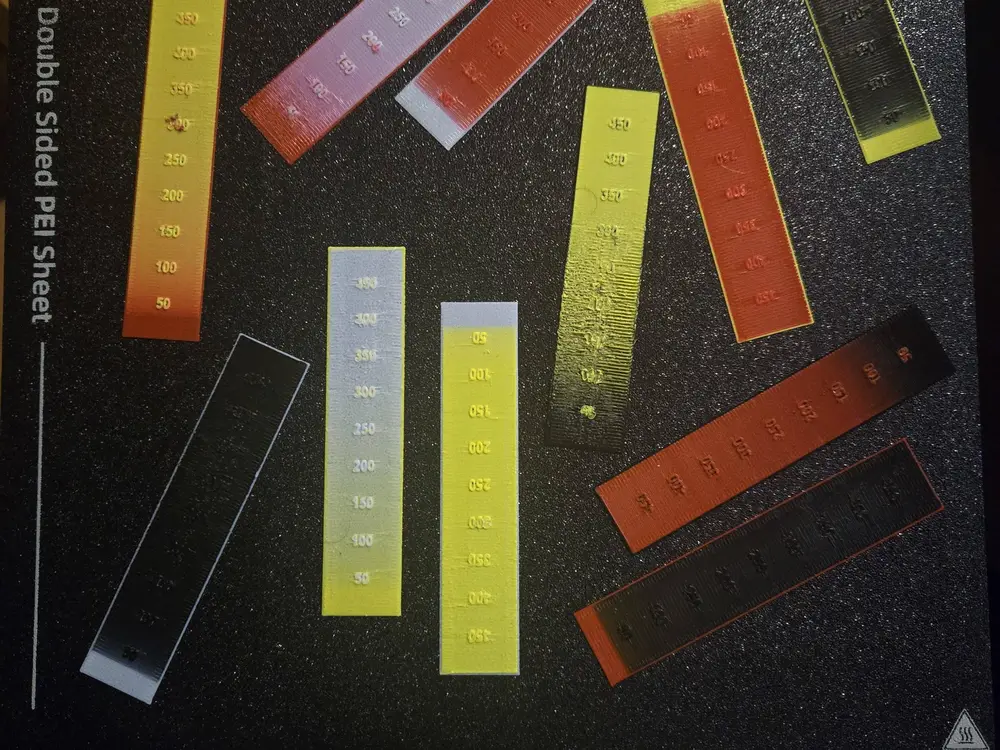
Once printing finishes, you will have a strip with multiple transition blocks between colors.
Each block represents a different flushing amount.
6 — Reading the results
This is where you optimize filament usage.
Steps:
- Carefully remove the samples
- Place them on a white background (paper works fine)
- Look at each sample and find the point where the previous color fully disappears.