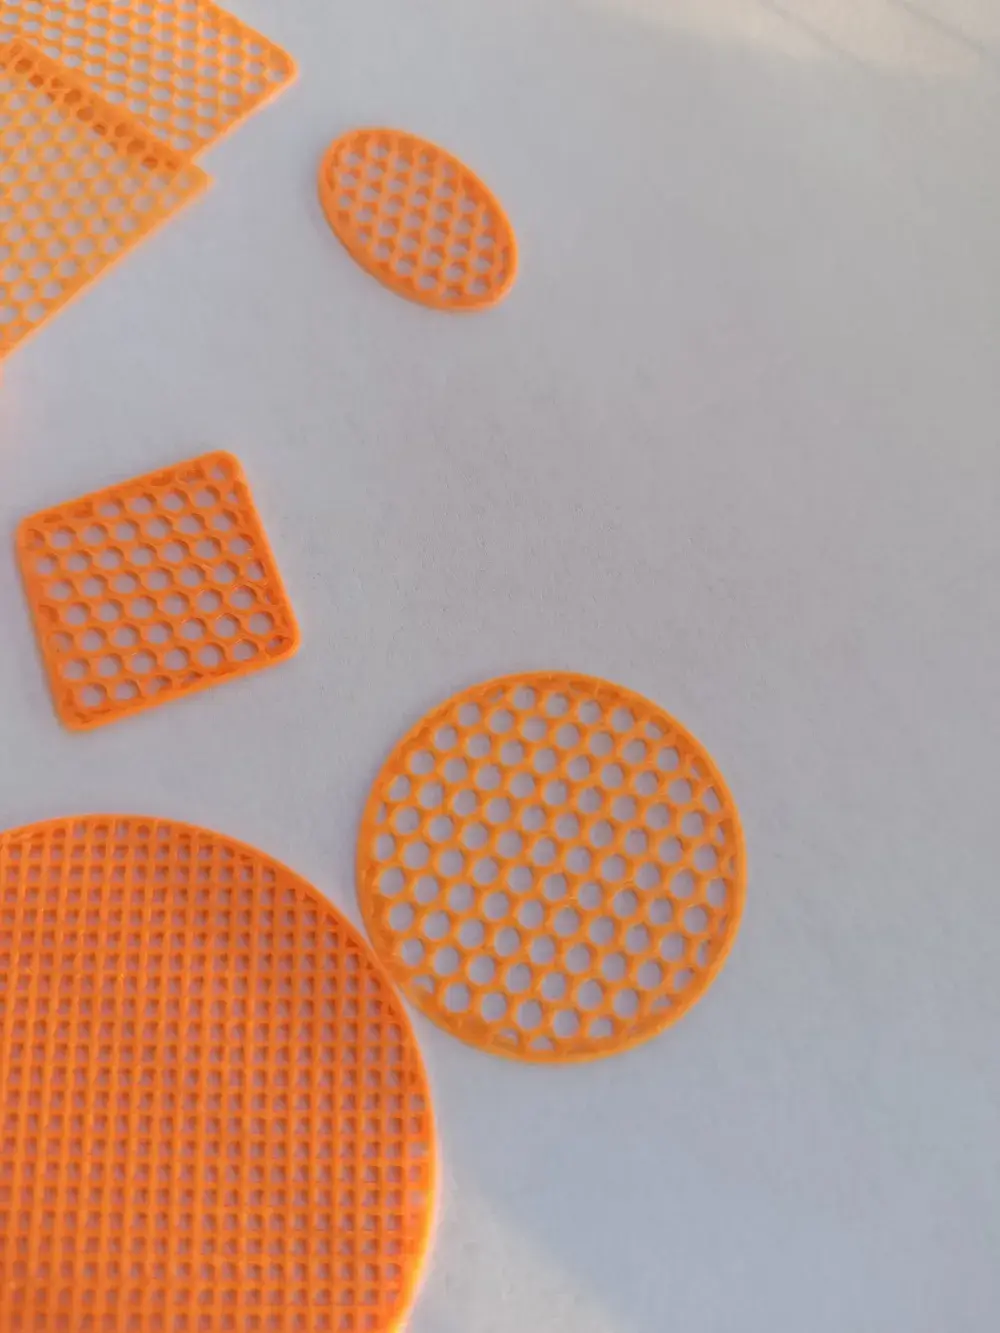
Custom Mesh Made Easy in Slicer


Make Your Own Protective Mesh in Slicer – 3 Shapes, Unlimited Sizes
Need a custom protective mesh for a fan, exhaust, ventilation opening, electronics enclosure, or another project?
Instead of designing a mesh from scratch in CAD, you can use one of these simple models and create your own custom version Slicer.
This project includes 3 basic shapes:
🔵 Round
⬜ Square
▢ Rounded Square
The idea is simple: choose a shape, scale it to the size you need, adjust the walls and infill, and print.
No CAD software or advanced modeling skills required.
🔧 How to Create Your Own Mesh
1. Choose a shape
Start by selecting the model that best matches your application:
- Round – great for fan guards and circular openings
- Square – useful for ventilation openings and enclosures
- Rounded Square – a good option for housings and openings with rounded corners
Import the model into Slicer.
2. Set your desired dimensions
Use the Scale tool to change the size of the model.
If you need to set the width and height independently, make sure to disable Uniform Scale.
This allows you to create practically any size you need, for example:
80 × 80 mm
120 × 100 mm
200 × 150 mm
or any other dimensions required for your project.
This is one of the main advantages of this method: the included models are not limited to a single predefined size.
3. Set Top and Bottom Shell Layers to 0
Go to:
Strength → Top Shell Layers → 0
Strength → Bottom Shell Layers → 0
The mesh is intended to be created primarily from the infill, so there should be no solid top or bottom surfaces covering it.
Important: Make sure you are using the current Bambu Studio settings/categories, as the exact location or naming of some options may vary between versions.
4. Adjust the Wall Loops
Set the number of Wall Loops according to the strength you need.
For example:
- 1 wall – lightweight and material-efficient
- 2 walls – a good general-purpose option
- 3+ walls – stronger and more rigid
The walls form the outer frame of the mesh, so increasing the number of wall loops can make the frame stronger.
5. Customize the Mesh Density
Now comes the most useful part.
The infill settings determine the structure of the actual mesh.
Choose an Infill Pattern that suits your application and adjust the Infill Density to control the size and spacing of the openings.
In general:
🔹 Higher infill density → smaller openings and more protection
🔹 Lower infill density → larger openings, better airflow and less material
The exact opening size depends on the selected infill pattern, density, line width and other slicer settings, so it is worth doing a small test print if the mesh needs to meet specific requirements.
🌀 What Can You Use It For?
This simple technique can be useful for many different projects, for example:
- 🌀 Fan guards
- 💨 Exhaust grilles
- 🌬️ Ventilation covers
- 🖥️ PC and electronics enclosures
- 🔧 Protective covers for openings
- 🛠️ Workshop equipment
- 🤖 DIY and robotics projects
- 🏠 Custom ventilation solutions
- 🔩 General-purpose protective meshes
The same basic model can be adapted to completely different applications simply by changing its dimensions and slicer settings.
💡 Why Use This Method?
The goal of this project is not to provide one specific finished mesh.
Instead, these models are meant to be simple starting points for creating your own custom mesh.
You can quickly change:
Shape → Dimensions → Wall Thickness → Infill Pattern → Mesh Density
This makes it possible to create a mesh that fits your project instead of searching for a model that happens to have exactly the right dimensions.
🚀 Give It a Try!
Download the shape that fits your project, import it into Slicer, adjust the scale and slicer settings, and create your own custom protective mesh.
If you make something useful with it, I would love to see your prints! ❤️
Feel free to share your make and show what you used the mesh for.
If this project helped you, consider leaving a Like and sharing it with other makers!
⚠️ Note
For applications where the mesh is a safety-critical component, always choose the mesh density, material and print settings appropriate for the specific application. A 3D-printed mesh should not be considered a certified safety guard unless it has been appropriately tested and certified for that use.