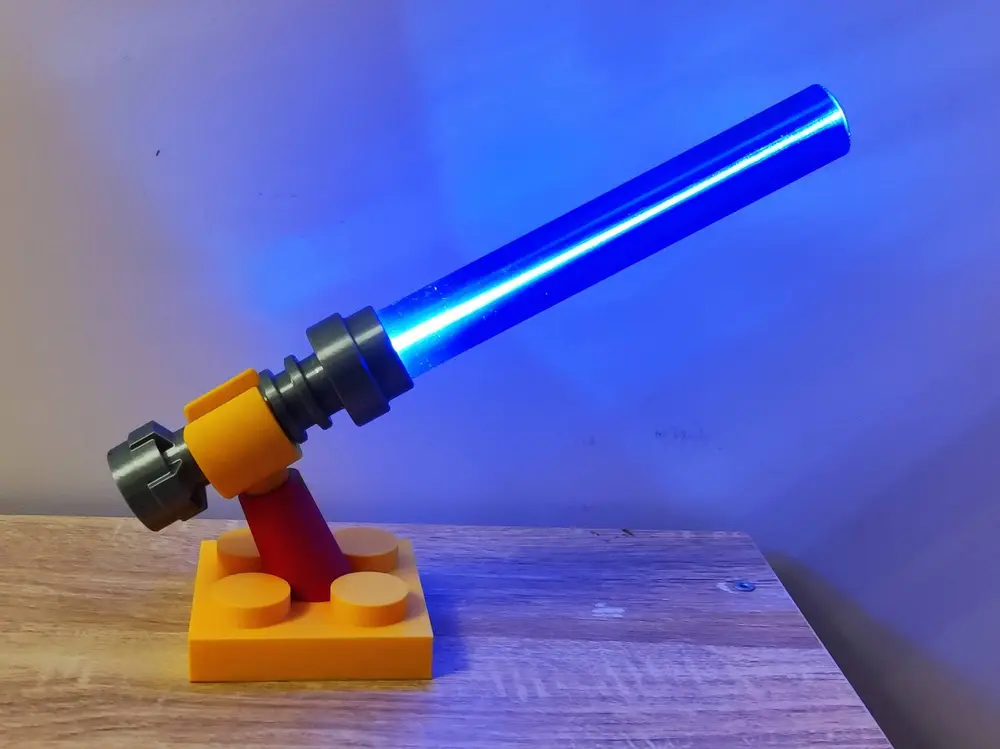
Lego Light Up Lightsaber with Stand using Anycubic LED Light Up Creative Kit


Here is a nice and easy project to use the Anycubic LED Light Up Saber Creative Kit.
I asked my son who's Lightsaber I should make and he said a LEGO one, so here we are.
Assembly is straight forward, No glue is needed, but can be added for extra secuirty. I wanted to keep the design reusable so if you decide you want to make another project, you can just slide out the LED and reuse it. I also wanted to be able to swap out the Lightsaber blades for different colors. I used transparent Blue PLA but also tested with solid colour PLA and it works pretty good.
To build this project you will need:
1x Anycubic LED Kit for Light Up Saber Creative Kit
2x M2 6mm Cap Head Screws (Optional)
There's a few options for display bases, there is a vertical 2x2 tile, the lightsaber just simply sits in the middle vertically. A one piece Arm and Tile base for when the arm and tile will be the same colour, There is also a seperate arm and tile so you can print them in different colours.
Pro Tip: Align the seams of the round parts to either back or paint the seams in a straight line so you can hide them at the back when displaying.
Assembly.
- Take the LED tube out of the Creative Kit and remove the end cap, You will need to plug the Battery connector into the socket connected to the button/charge PCB. Test it by pushing the button. One Press turns it in, another press dims the light, another press makes it flash and another press turns it off.
- Slide the LED tube into the Lightsaber Body, just make sure that the Lens and Reflector on the LED are aligned and set in place.
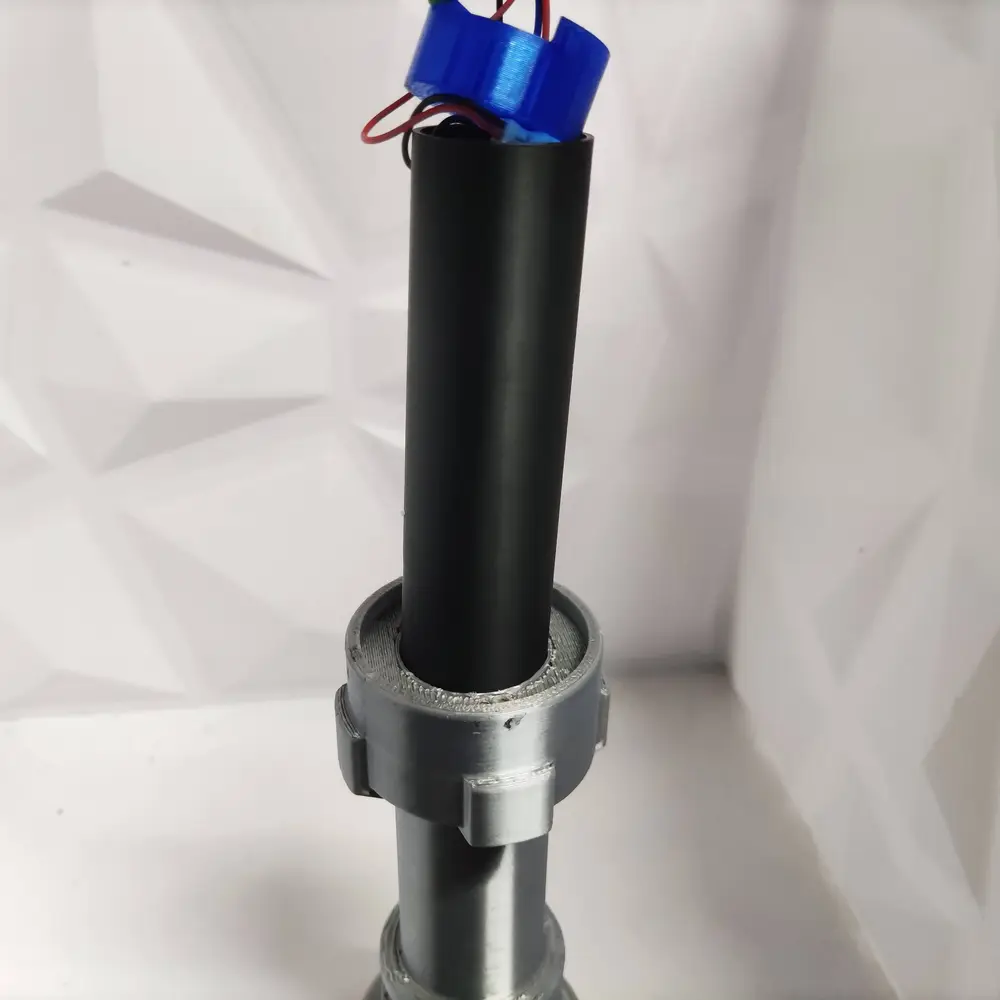
- Put in the switch holder, routing the wires in the cut out notch. You want to align it so the screw holes are to the direct left and right
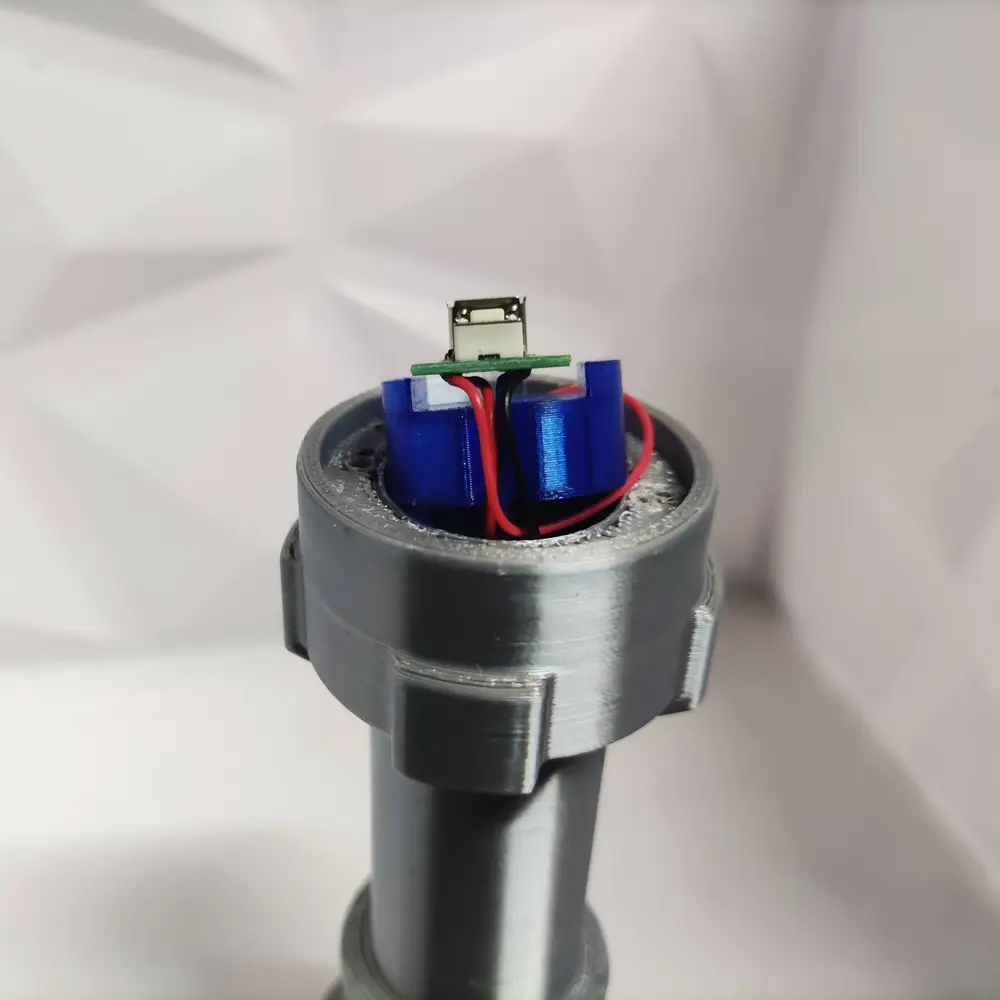
- Put the bottom cap over the button PCB, lining up the USB and button in their cutouts. Screw the M2 screws in, you could possibly just use glue but then it would kind of defeat the purpose of the screws.
- Put the included silicone grommet into the button hole, with the smooth side facing out.
- Last step is to glue the Lightsaber Top onto the body and assemble which ever stand you are going to use. The hand may be a little tight around the Lightsaber body, just take your time and it will fit.