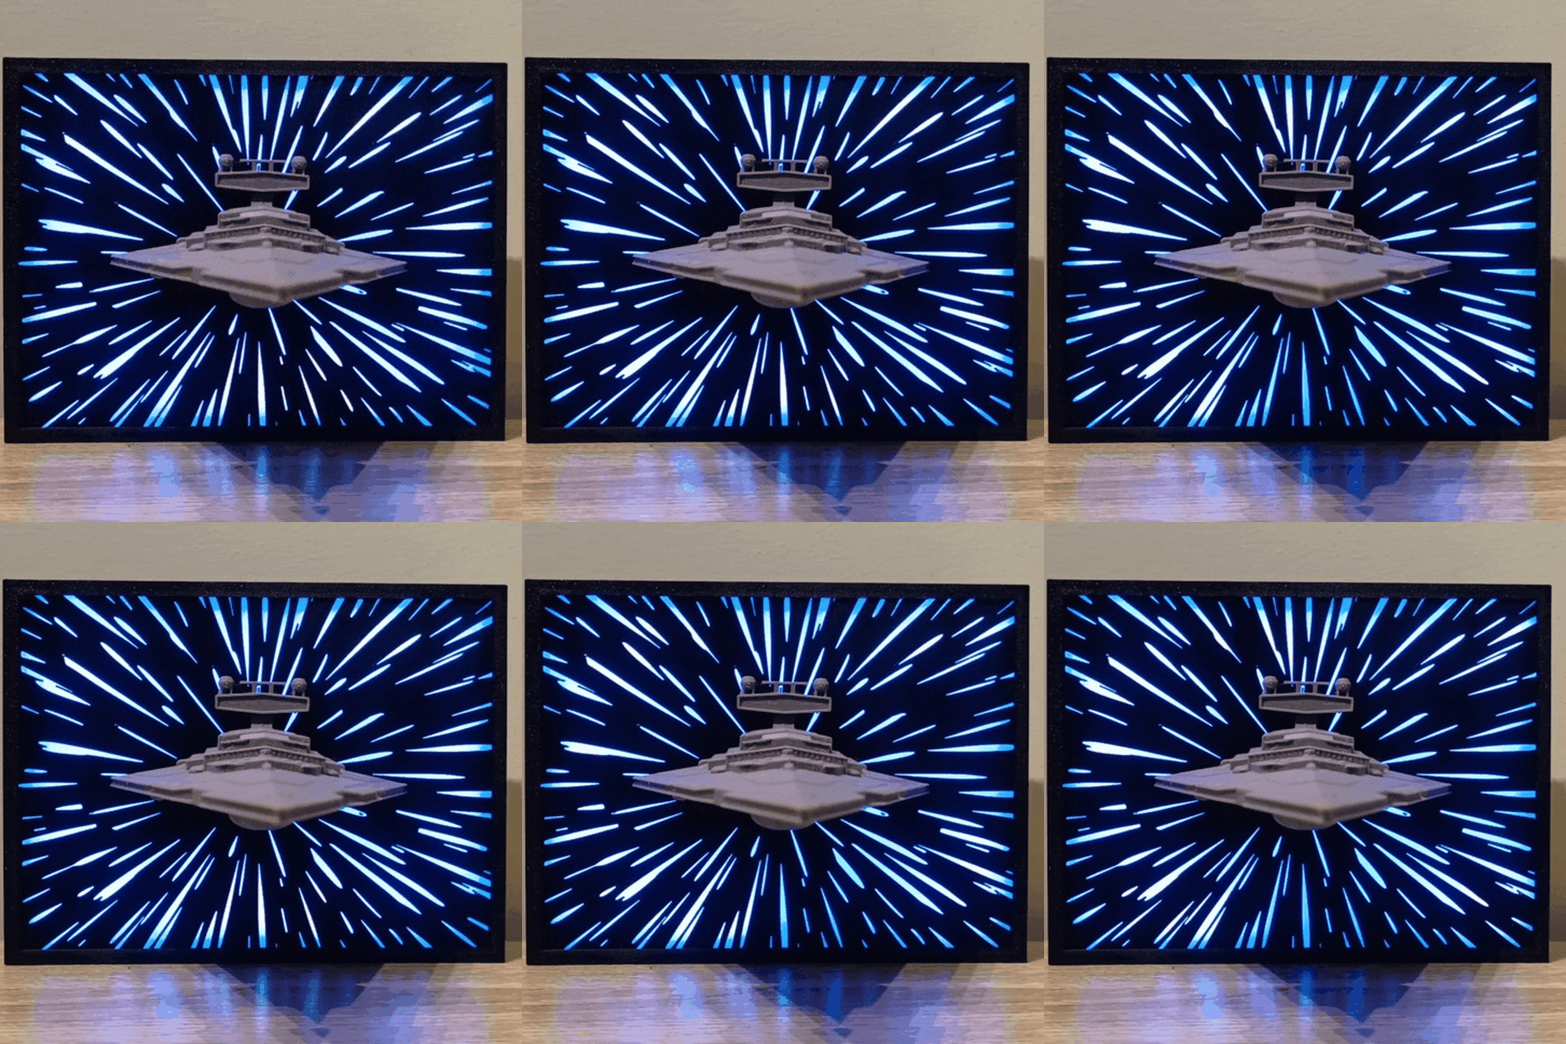
Star Wars Star Destroyer in Hyperspace – LED Book Nook & Shelf Diorama


Attention, Imperial officers, bounty hunters and Star Wars fans across the galaxy!
Turn an ordinary bookshelf into a window to hyperspace with this illuminated Star Destroyer book nook. The layered design creates a dramatic sense of depth, placing a colossal Imperial Star Destroyer against a glowing hyperspace backdrop as it tears through space at lightspeed.
Designed to sit between books or stand alone as a display piece, this miniature sci-fi scene combines 3D printing, multicolour artwork and programmable LED lighting to create a striking portal into a galaxy far, far away.
✨ Features
A Miniature Hyperspace Scene
The layered ship, illuminated background and surrounding frame create the illusion of looking through a window into deep space.
It works especially well between books, where the frame becomes a glowing sci-fi world hidden inside the shelf.
62 Programmable LEDs
The main version uses 62 WS2812B addressable LEDs, creating bright hyperspace streaks and animated lighting effects behind the Star Destroyer.
One moment the ship is looming silently in space. The next, the hyperdrive engages and the entire scene erupts into light.
WLED Control
The LEDs are controlled using WLED on a D1 Mini ESP8266, allowing you to adjust:
- Colour
- Brightness
- Animation speed
- Hyperspace-style effects
- Starfield patterns
- Imperial red lighting
- Custom presets
WLED can be controlled through a web browser or the WLED mobile app.
Simpler Lighting Option
For builders who are not yet comfortable with soldering or programming, the frame can also be illuminated using a ready-made USB LED strip or light kit.
Suitable strips are widely available from retailers such as Amazon and AliExpress, including versions with built-in colour changes and animated lighting patterns.
These kits will not offer the same level of customisation as the WLED version, but they can still produce an effective hyperspace-style glow with much simpler assembly.
Look for a compact 5 V USB-powered LED strip that can be arranged to fit inside the backplate.
The WS2812B and WLED setup remains the recommended option for the full animated effect, adjustable colours, brightness control and custom presets.
Designed for Straightforward Assembly
The ship and hyperspace artwork fit onto the illuminated backplate, while the outer frame slides over the completed assembly.
A step-by-step guide is included below, so no astromech assistance should be required.
🎨 Printing Notes
The model is designed for multicolour printing, either with an automatic material system or with manual filament changes.
When printing manually at a 0.2 mm layer height, use:
- White from the beginning
- Change to black at 0.6 mm
- Change to grey at 1.8 mm
The final grey can be replaced with silver, charcoal or another preferred Star Destroyer colour.
Exact filament-change layers should always be checked in the slicer preview before printing.
🛠 Assembly Guide
A complete Bill of Materials (BOM), including the required electronics and hardware, is available as a PDF in the Documentation section.
WS2812B LEDs and D1 Mini ESP8266
Step 1: Install WLED
Before wiring the electronics, connect the D1 Mini ESP8266 to a computer and install WLED using the official web installer.
You can configure it for your home Wi-Fi during installation or leave it in access-point mode and configure it later.
Step 2: Prepare the USB Power Cable
Feed a USB power cable through the opening in the backplate.
Carefully expose the internal wires and locate:
- Red: 5 V
- Black: Ground
Prepare two additional short wires for 5 V and ground.
Join:
- The additional red wire to the USB 5 V wire
- The additional black wire to the USB ground wire
This allows the LED strip to receive power directly from the USB supply while the D1 Mini connects to the same power lines.
Also prepare one separate wire for the LED data signal.
Step 3: Connect the LED Strip
Solder the wires to the input end of the WS2812B strip:
- 5 V wire → 5V pad
- Ground wire → GND pad
- Signal wire → DIN pad
Check the arrows printed on the strip. They must point away from the controller and in the direction the data will travel.
Step 4: Install the LEDs
Remove the adhesive backing and attach the LED strip around the inside wall of the backplate in two rows.
The strip may be cut only at the marked cutting points. Where sections are separated, reconnect them using short soldered jumper wires.
Position the LEDs evenly so the hyperspace background is illuminated consistently.
Step 5: Connect the D1 Mini
Connect the shared power wires to the D1 Mini:
- 5 V → 5V pin
- Ground → G pin
- LED data → D4 / GPIO2
The LED strip and D1 Mini must share a common ground.
Step 6: Secure the Controller
Attach the D1 Mini to the backplate using double-sided tape or a small amount of hot glue.
Mount it so the onboard indicator LED does not shine through the hyperspace artwork.
Step 7: Assemble the Display
Place the Star Destroyer and hyperspace background onto the backplate.
Check that:
- The artwork is correctly aligned
- The LEDs shine through evenly
- No wires cross visible areas
- No wires are trapped by the frame
Slide the outer frame over the completed backplate assembly.
Step 8: Test the Lighting
Connect the model to a suitable 5 V, 2 A USB power supply.
If the LEDs do not illuminate, check:
- LED strip direction
- DIN connection
- Shared ground
- Solder joints
- WLED LED count and GPIO settings
Set the LED output pin to GPIO2 and the LED count to 62.
Step 9: Configure WLED
Connect to WLED using the app or a web browser.
Experiment with colours and animations to create:
- Blue hyperspace streaks
- White starfields
- Imperial red lighting
- Pulsing engine-style effects
- Custom animated presets
Step 10: Display Between Books
Place the completed model on a bookshelf, desk or inside a display cabinet.
Between books, the illuminated frame creates the effect of a hidden window opening directly into hyperspace.
The Empire’s reach may be infinite—but thankfully this version only requires about one shelf space.
您不得分享、转授权、出售、出租、托管、转让或分发该数字文件或该对象的3D打印版本,以及以数字或物理形式存在的任何其他衍生作品(包括混音)。未经许可,您不得以任何方式使用这些物品进行费用收取。