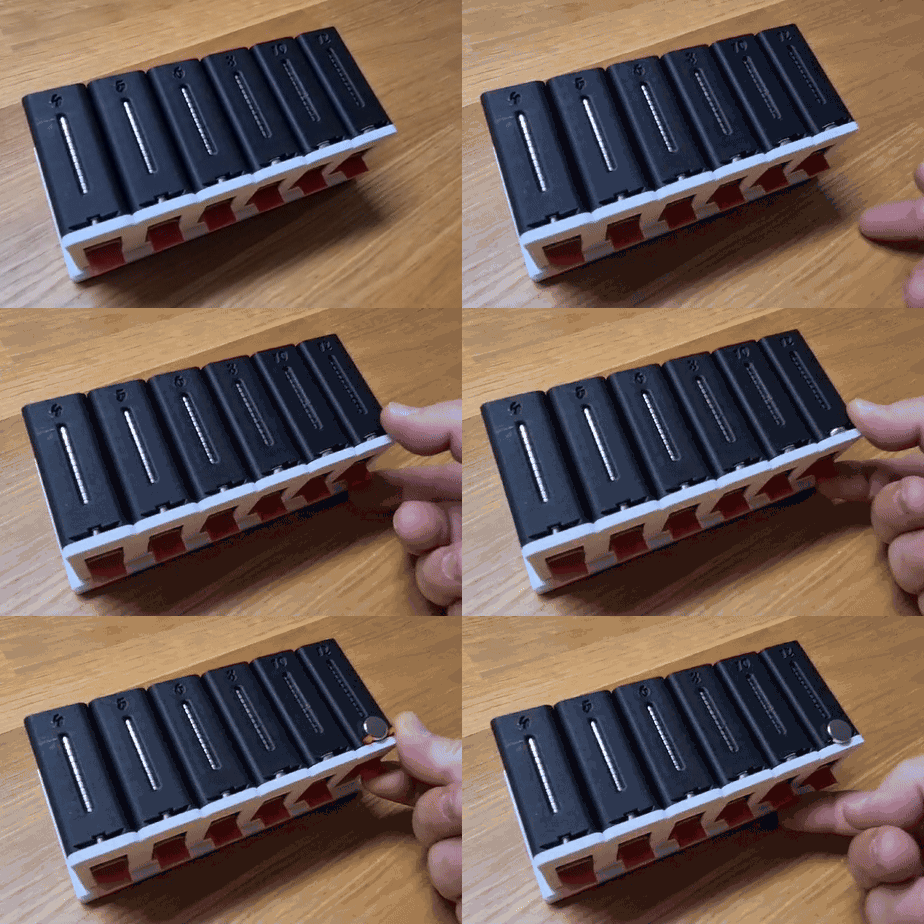
MMD1-z³D Modular Magnet dispenser, 4-12mm for HSW and Skadis


Hey guys,
I was not happy with any of the Magnet holders out there so i made one myself.
It is compatible with HSW as well as IKEA skadis, and it is modular! You can use it a s a single unit or stack them up up to 8 units in a row.
the trigger is suspended by a rubber band and will return to its resting position. one triggerpull produces one magnet at a time.
Magnet compatibility as follows:
- 4x2mm and 4x3mm
- 5x2mm and 5x3mm
- 6x2mm and 6x3mm
- 8x2mm and 8x3mm
- 10x2mm and 10x3mm
- 12x2mm and 12x3mm
stores up to 30 Magnets at 2mm thickness or 20Magnets at 3mm thickness.
have fun with this and if you like it feel free to like comment, rate or even send me some recommendations for improovement.
Installation:
you will require one regular rubber band per unit, preferably around 30mm in diameter, others will work to, as you can tie a knot to shorten them.
Print all parts.
- you will need Dispenser(s), Slider(s), connector(s), and a frame according to the quanities of the amount you would like to stack.
- slide the first dispensers onto the frame, and up so you have access to the slider section between.
- Insert the rubber band through the back of the frame
- Insert the slider into the dovetail from the front
- place the rubber band over the trigger of the slider.
- slide the dispenser into its final position while making sure not to pich the rubber band.
- loop the rubber band around one of the tree tensioning points. again checking the band to prevent exessive drillup
- repeat steps 2-7 untill all dispensers are on the frame
- install your prefered connecter to the dovetail of the frame
- slide the outer frame over the back of the unit to prefent the dispensers to come loose.
Load the Magnets and off you go!!
(make sure to keep the polarity the same way around for every dispenser else the magnets might influence each other, especially on the 8-12mm sizes.)
Issue tracking:
due to its tight tolerances different printers might produce slightly different results especially on the dove tail of the slider. or the smaller 4mm hole. things like elephant foot or line skips can cause issues. here is what i found useful:
The slider:
the slider needs to run freely in the dove tail, i designed it with enough clearance however if you still have an issue you can give it a slight touch with some fine grid sandpaper at its tips.
4mm magnet hole:
again the clearance of all the holes is propotional so there should be enough room for the magnets to always fall to the bottom by gravity on its own. if its not then clean out the hole using a 4mm drill, twisting it inside the hole a couple times. that did the trick for me.
If you experiance any issues please let me know, i might have advise.
also this was a extended weekend design and surely can use some twaeking.
im currently micro-optimizing the slider.
if you have any recommendations do not hesitate to let me know i will look into it.
You are prohibited from sharing, sub-licensing, selling, renting, hosting, transferring, or distributing the digital file or 3D printed versions of this object, as well as any other derivative work in either digital or physical form (including remixes).You are not allowed to use the objects in any manner that involves charging money or collecting fees without permission.