Magnetic Playground - Ring Magnets


Magnetic Playground – Ring Magnet Levitation Lab
Turn invisible magnetic forces into a hands-on experiment.
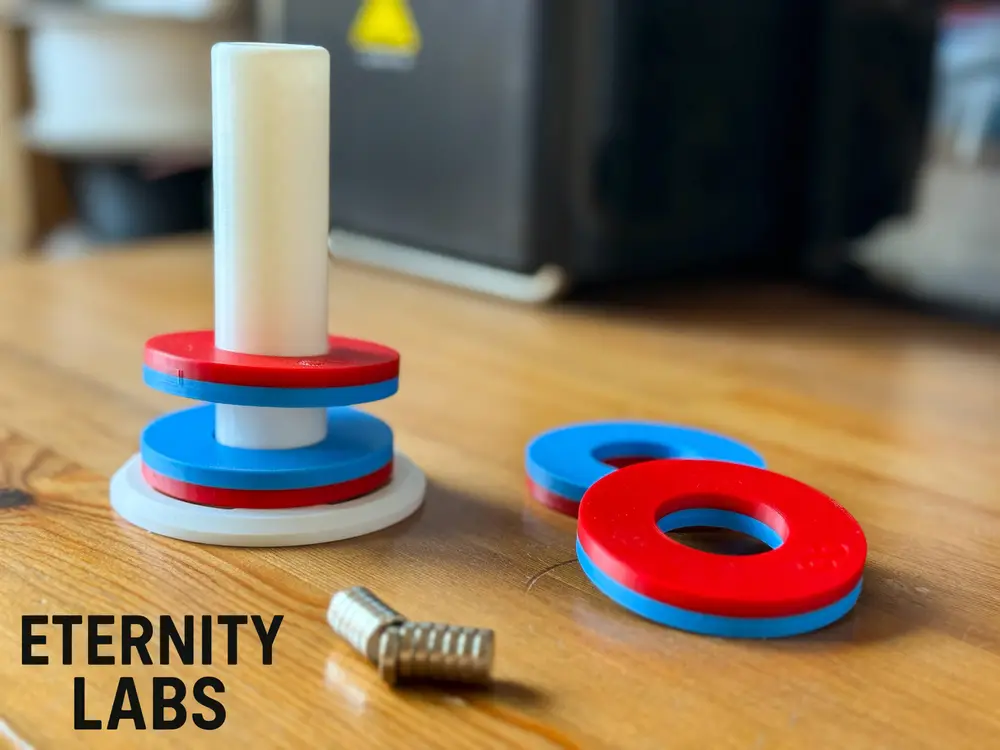
The Magnetic Playground – Ring Magnets model is an interactive STEM teaching aid designed to help children explore magnetic attraction, repulsion, polarity, and magnetic levitation.
By flipping and stacking the ring magnets on the stand, learners can immediately see how changing the orientation of a magnet changes the force between the rings. Opposite poles attract and pull together, while matching poles repel and create a visible floating gap.
It is a simple, memorable way to demonstrate that magnets can exert force without touching.
What This Model Teaches
- Magnets have two poles.
- Opposite poles attract.
- Matching poles repel.
- Magnetic forces can act across a gap.
- Repelling magnetic forces can support an object against gravity.
- The strength of magnetic force changes with distance.
- Stable levitation requires the stand to keep the rings aligned.
Parts Required
- Printed base and guide post
- Printed ring-magnet components
- 10 round neodymium magnets, each measuring 10 × 3 mm
- A small amount of glue
Printing and Magnet Insertion
The print profile includes a programmed pause so the magnets can be inserted during printing.
IMPORTANT: THE PRINTER WILL PAUSE FOR YOU TO INSERT 10 ROUND 10 × 3 MM NEODYMIUM MAGNETS. I RECOMMEND USING A SMALL DROP OF GLUE WHEN PLACING EACH MAGNET INTO ITS SLOT. THIS HELPS PREVENT THE MAGNETS FROM LIFTING, MOVING, OR ATTRACTING TO EACH OTHER, WHICH COULD CAUSE A COLLISION WITH THE PRINT HEAD WHEN PRINTING RESUMES.
When the printer pauses:
- Do not move the print bed or printed parts.
- Place one 10 × 3 mm neodymium magnet into each prepared cavity.
- Check the orientation of every magnet before inserting it.
- Keep the magnetic polarity consistent with the red-and-blue color convention.
- Add a small drop of glue to each cavity to hold the magnet securely.
- Make sure every magnet sits completely below the height of the current print layer.
- Confirm that no magnets are loose, raised, or attached to nearby magnets.
- Allow the glue to grip before resuming the print.
- Resume printing and watch the first few layers carefully.
Polarity Setup
Correct magnet orientation is essential for the model to work.
Before placing the magnets into the paused print, identify the north and south faces and arrange them consistently. The same colored side of each completed ring should represent the same magnetic pole.
For example:
- Red side facing upward = one pole
- Blue side facing upward = the opposite pole
Test every magnet before gluing it into place. If one magnet is installed in the opposite direction, that ring may attract when it is expected to repel.
Safety During Printing
NEODYMIUM MAGNETS CAN JUMP OUT OF THEIR CAVITIES OR ATTRACT TO THE PRINTER’S METAL COMPONENTS. ALWAYS SECURE THEM WITH A SMALL DROP OF GLUE, MAKE SURE THEY ARE FULLY SEATED, AND CHECK THAT THEY CANNOT CONTACT THE NOZZLE OR PRINT HEAD BEFORE RESUMING THE PRINT.
Keep loose magnets away from the printer while it is operating, and supervise the magnet-insertion stage carefully.
You are prohibited from sharing, sub-licensing, selling, renting, hosting, transferring, or distributing the digital file or 3D printed versions of this object, as well as any other derivative work in either digital or physical form (including remixes).You are not allowed to use the objects in any manner that involves charging money or collecting fees without permission.