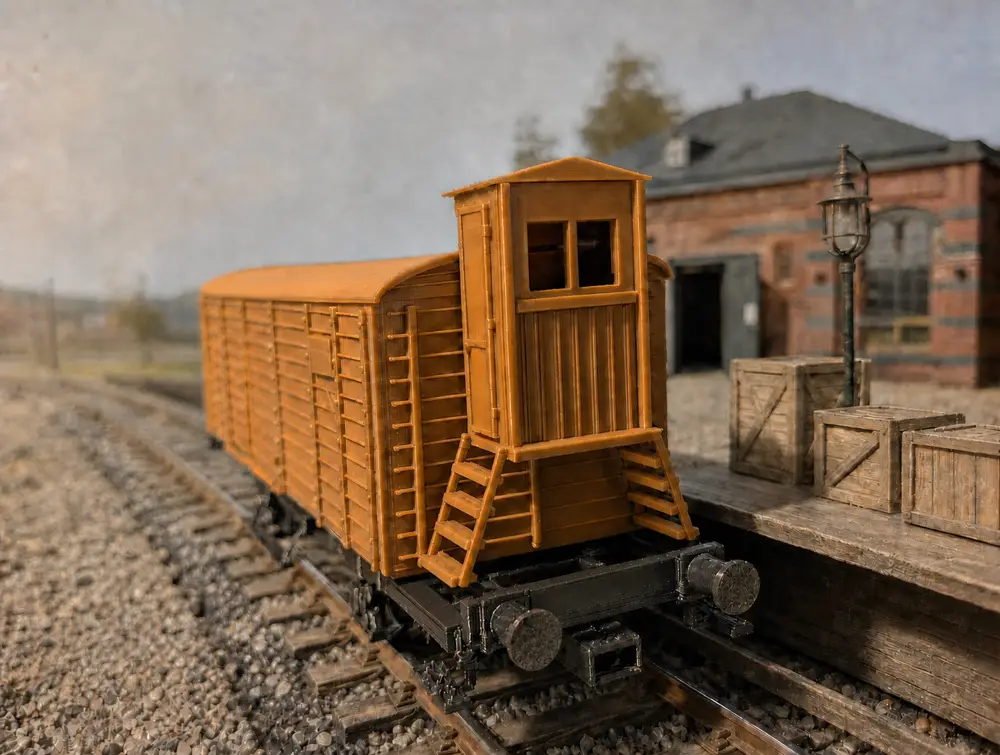
Freightwagon / Güterwagen G10 DRG Spur 0 scale 1/45


English:
Here, I have designed a G 10 covered freight wagon with a brakeman's cab—Gauge 0, 1:45 scale.
This model depicts a G 10 type freight wagon in the late DRG configuration. The wagon features a wooden body, a raised brakeman's cab, and an air brake system. Visible details such as axle boxes, distinctive leaf springs, running boards, and steps have been replicated.
The model is designed for FDM printing using a 0.4 mm nozzle and is divided into several components for easy assembly. The wagon body is printed as a single unit, while the roof, brakeman's cab, and cab roof are separate parts. The underframe, plug-in buffer beams, buffer heads, wheelsets, and various smaller attachments are also printed individually.
The underframe is designed as a single, integrated component. Each of the two wheelsets consists of an axle and two push-fit wheels. They are inserted into the axle boxes from below and secured using separate retaining plates (either screwed or glued in place). This allows the wheels to rotate freely and enables the wheelsets to be removed if necessary.
The brakeman's cab attaches to the wagon body via two mounting pins. The pins have a diameter of 2.4 mm, while the corresponding mounting holes are 2.8 mm. The separate roof is attached after assembly. The window openings are fully open, allowing for the insertion of clear plastic sheet from the inside. Holes are provided for the handrail, which can be bent from wire approximately 0.6 mm thick.
The buffer beams plug into both ends of the wagon. The intricate buffer heads are separate parts and are printed flat on the face of the buffer head. The coupler pockets are designed according to NEM 362/365 geometry with minimal FDM clearance, featuring the three pin positions specified by the NEM 365 grid.
For printing, I recommend PLA or PETG; I used PETG with a layer height of 0.16 mm, at least three wall lines, and approximately 15–20% infill. The STL files are already oriented for printing. The largest component requires a print bed area of roughly 220 × 90 mm.
You will also need some clear plastic sheet, wire (approx. 0.6 mm thick), modeling glue, and—optionally—small screws for the axle bearing retaining plates. Depending on your printer, material, and calibration, the plug-in connections may require slight adjustment before assembly.
This is a personal project of mine; while it may not be perfect, it is certainly an attractive model.
Enjoy!
Deutsch:
Hier habe ich einen Gedeckten Güterwagen G 10 mit Bremserhaus – Spur 0, Maßstab 1:45 konstruiert.
Dieses Modell zeigt einen Güterwagen der Bauart G 10 in später DRG-Ausführung. Der Wagen besitzt einen Holzaufbau, ein erhöhtes Bremserhaus und eine Druckluftbremsanlage. Achslager, markante Blattfedern, Trittbretter und Treppen wurden als sichtbare Details nachgebildet.
Das Modell ist für den FDM-Druck mit einer 0,4-mm-Düse ausgelegt und in mehrere montagegerechte Bauteile unterteilt. Der Wagenkasten wird als eine Einheit gedruckt, während Wagendach, Bremserhaus und Bremserhausdach separate Teile bilden. Auch das Untergestell, die steckbaren Pufferbohlen, Pufferteller, Radsätze und einige kleinere Anbauteile werden einzeln gedruckt.
Das Untergestell wurde als zusammenhängendes Bauteil konstruiert. Die beiden Radsätze bestehen jeweils aus einer Achse und zwei aufsteckbaren Rädern. Sie werden von unten in die Achslager eingesetzt und anschließend mit separaten Halteplatten verschraubt oder geklebt werden. Dadurch bleiben die Räder frei beweglich und die Radsätze können bei Bedarf wieder entnommen werden.
Das Bremserhaus wird mit zwei Steckpins am Wagenkasten befestigt. Die Pins haben einen Durchmesser von 2,4 mm, die zugehörigen Aufnahmebohrungen 2,8 mm. Das separate Dach wird nach der Montage aufgesetzt. Die Fenster sind vollständig geöffnet, sodass von innen klare Kunststofffolie eingesetzt werden kann. Für den Handlauf sind Bohrungen vorgesehen; er kann aus ungefähr 0,6 mm starkem Draht gebogen werden.
Die Pufferbohlen werden an beiden Wagenenden eingesteckt. Die filigranen Pufferteller sind separate Teile und werden flach auf der Tellerseite gedruckt. Kupplungsschächte sind nach NEM‑362/365-Geometrie gebaut, mit kleinem FDM-Spiel, und die drei Stiftpositionen nach dem NEM‑365-Raster .
Für den Druck empfehle ich PLA oder PETG, ich habe PETG genutzt, eine Schichthöhe von 0,16 mm, mindestens drei Wandlinien und etwa 15 bis 20 Prozent Füllung. Die STL-Dateien sind bereits in passenden Drucklagen ausgerichtet. Das größte Bauteil benötigt ungefähr 220 × 90 mm Platz auf dem Druckbett.
Zusätzlich werden etwas klare Kunststofffolie, ungefähr 0,6 mm starker Draht, Modellbaukleber und gegebenenfalls kleine Schrauben für die Achslager-Halteplatten benötigt. Abhängig von Drucker, Material und Kalibrierung können die Steckverbindungen vor der Montage leicht nachgearbeitet werden müssen.
Dies ist ein Modell welches ich Privat erstelle und noch nicht Perfekt ist, aber ein durchaus ansehnliches Modell darstellt.
Viel Spass damit.
您不得分享、转授权、出售、出租、托管、转让或分发该数字文件或该对象的3D打印版本,以及以数字或物理形式存在的任何其他衍生作品(包括混音)。未经许可,您不得以任何方式使用这些物品进行费用收取。